

Backing up your files over the network or to external drive is not that hard if you have only few files/folder to backup. But if you are going to do it for multiple clients and over a multiple network path locations you will have to do it multiple times and with an extra load of patience. Not to mention if you are backing up huge file size, let’s say 100 GB.
You will have options to accomplish this, you may use paid backup softwares, an open source backup software or just use one of the in built Microsoft Operating systems feature (from XP to Windows 10) which is ROBOCOPY (Robust File Copy).
What are the advantages of using Robocopy in backing up your files?
- Robocopy when “synching” will only copy a file if the file it is being compared to has either a different file size or time stamp, so as to not waste time copying the same exact file.
- Robocopy has the ability to delete source files after copying them. In other words it will move the files rather then copy them.
- Robocopy can be scheduled so that it can copy whenever you need it to not at the time you run the command.
- Robocopy also works over network connections so you can copy over a network easily. It also has the ability to pick up where it left off if it’s disconnected. This means that when a copy fails at 99% you can just finish the last bits that were not copied.
Robocopy has a lot of option you can use when backing up your files. Just run it in your command prompt then type the command “robocopy /?” it will show you a number of options you can utilize.

How can you implement it in your own network environment and make the process automated?
Normally there are only 3 steps that you have to accomplish to successfully implement this.
- Determine which folders do you intend to backup (it may be shared folder or local folder or vice versa) and the destination of the backup. In my example below, we will use it to backup our huge lists folders & files from our file server named “adserver” and the destination will be my local PC’s HDD.

- Create a batch files using notepad then save it as .bat extension. In my example below, you will see in the notepad that I used some options after the robocopy command. You can explore what option is useful according to your requirement by typing the /? after the command. In this case, I saved it as “KIMBE BACKUP.bat”

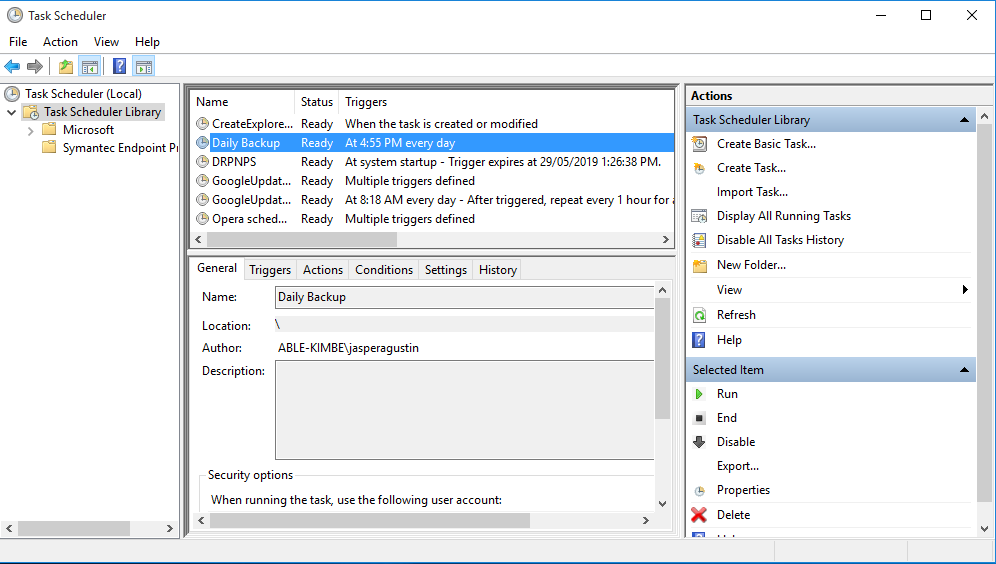
- Automate the process using Task Scheduler which is a feature of every Microsoft Operating System.

Create a NEW TASK, then under trigger, choose according to your requirement. You can choose on schedule or every startup. What I’m am going to choose here is to run it Daily every 4:55 PM.

Under action tab, click new, then run program and select the batch file that we have created earlier, in this case it is saved in my desktop which is “KIMBE BACKUP.bat”.

Condition & Settings are optional only and we won’t be touching that. Hit ok and it will ask for our credential. I do recommend to use an administrator account if you are in the domain environment.

Then once all are set, you can manually run the task to check if the task will be executed properly. Just hit the run icon on the lower right portion of the Task Scheduler window.
Below you can see that the batch file is running without a problem. I am trying to backup 200 GB of files. Initially it will take a while to complete, but once it is completed, every time the task will run it will only take more or less 2 minutes to complete. Since it will bypass the same timestamp file with same sizes. Once you update the file, that is the only file that will be copied on your next backup and not the whole 200 GB.

The backup is now complete and it should display the summary of the backup similar before.

Should you have question above, just leave a comment below and I’ll make sure that I will reply.